Meta layer setup
For the first step you have to setup the meta-layer configuration of your Yocto project. We created 2 custom meta-layer and provide a download link in the further text.
Meta-layer splash screen
You can add a meta-layer to use a custom splash screen. How to use this meta-layer is described in Yocto Raspberry Pi 4 with custom splash screen.
You can download the meta-layer zip file via browser from meta-interelectronix-rpi.zip.
Meta-layer Qt and demo application
You can download the meta-layer zip file via browser from meta-interelectronix-rpi-qt.zip.
This meta-layer contains setup informations for including Qt and the Qt demo application. We use the Qt demo application for autostart as it is available in the Qt recipes.
The layer also includes the image information "qt5-ix-basic-image", that we later need for building the project with
bitbake -k qt5-ix-basic-image
Include meta-layer in bblayers.conf
Now you can add the downloaded layers to your Yocto project bblayers.conf file. If you use the setup as described in Yocto build Raspberry Pi 4 in a docker environment the bblayers.conf file should look like:
BBLAYERS ?= " \
  /workdir/poky-honister/meta \
  /workdir/poky-honister/meta-poky \
  /workdir/poky-honister/meta-yocto-bsp \
  /workdir/poky-honister/meta-openembedded/meta-oe \
  /workdir/poky-honister/meta-openembedded/meta-multimedia \
  /workdir/poky-honister/meta-openembedded/meta-networking \
  /workdir/poky-honister/meta-openembedded/meta-perl \
  /workdir/poky-honister/meta-openembedded/meta-python \
  /workdir/poky-honister/meta-raspberrypi \
  /workdir/poky-honister/meta-security \
  /workdir/poky-honister/meta-qt5 \
  /workdir/rpi-build/meta-interelectronix-rpi \
  /workdir/rpi-build/meta-interelectronix-rpi-qt \
  "
If you use your own project, you have to adjust the file paths on your needs.
Autostart Qt configuration
To autostart the Qt demo application, we use systemd and install a service. All needed files and configuration files are included in the above downloaded meta-interelectronix-rpi-qt.zip file.
qt_demo_start.service
The needed files are stored in the directory "meta-interelectronix-rpi-qt/recipes-ext/systemd/...".
local.conf
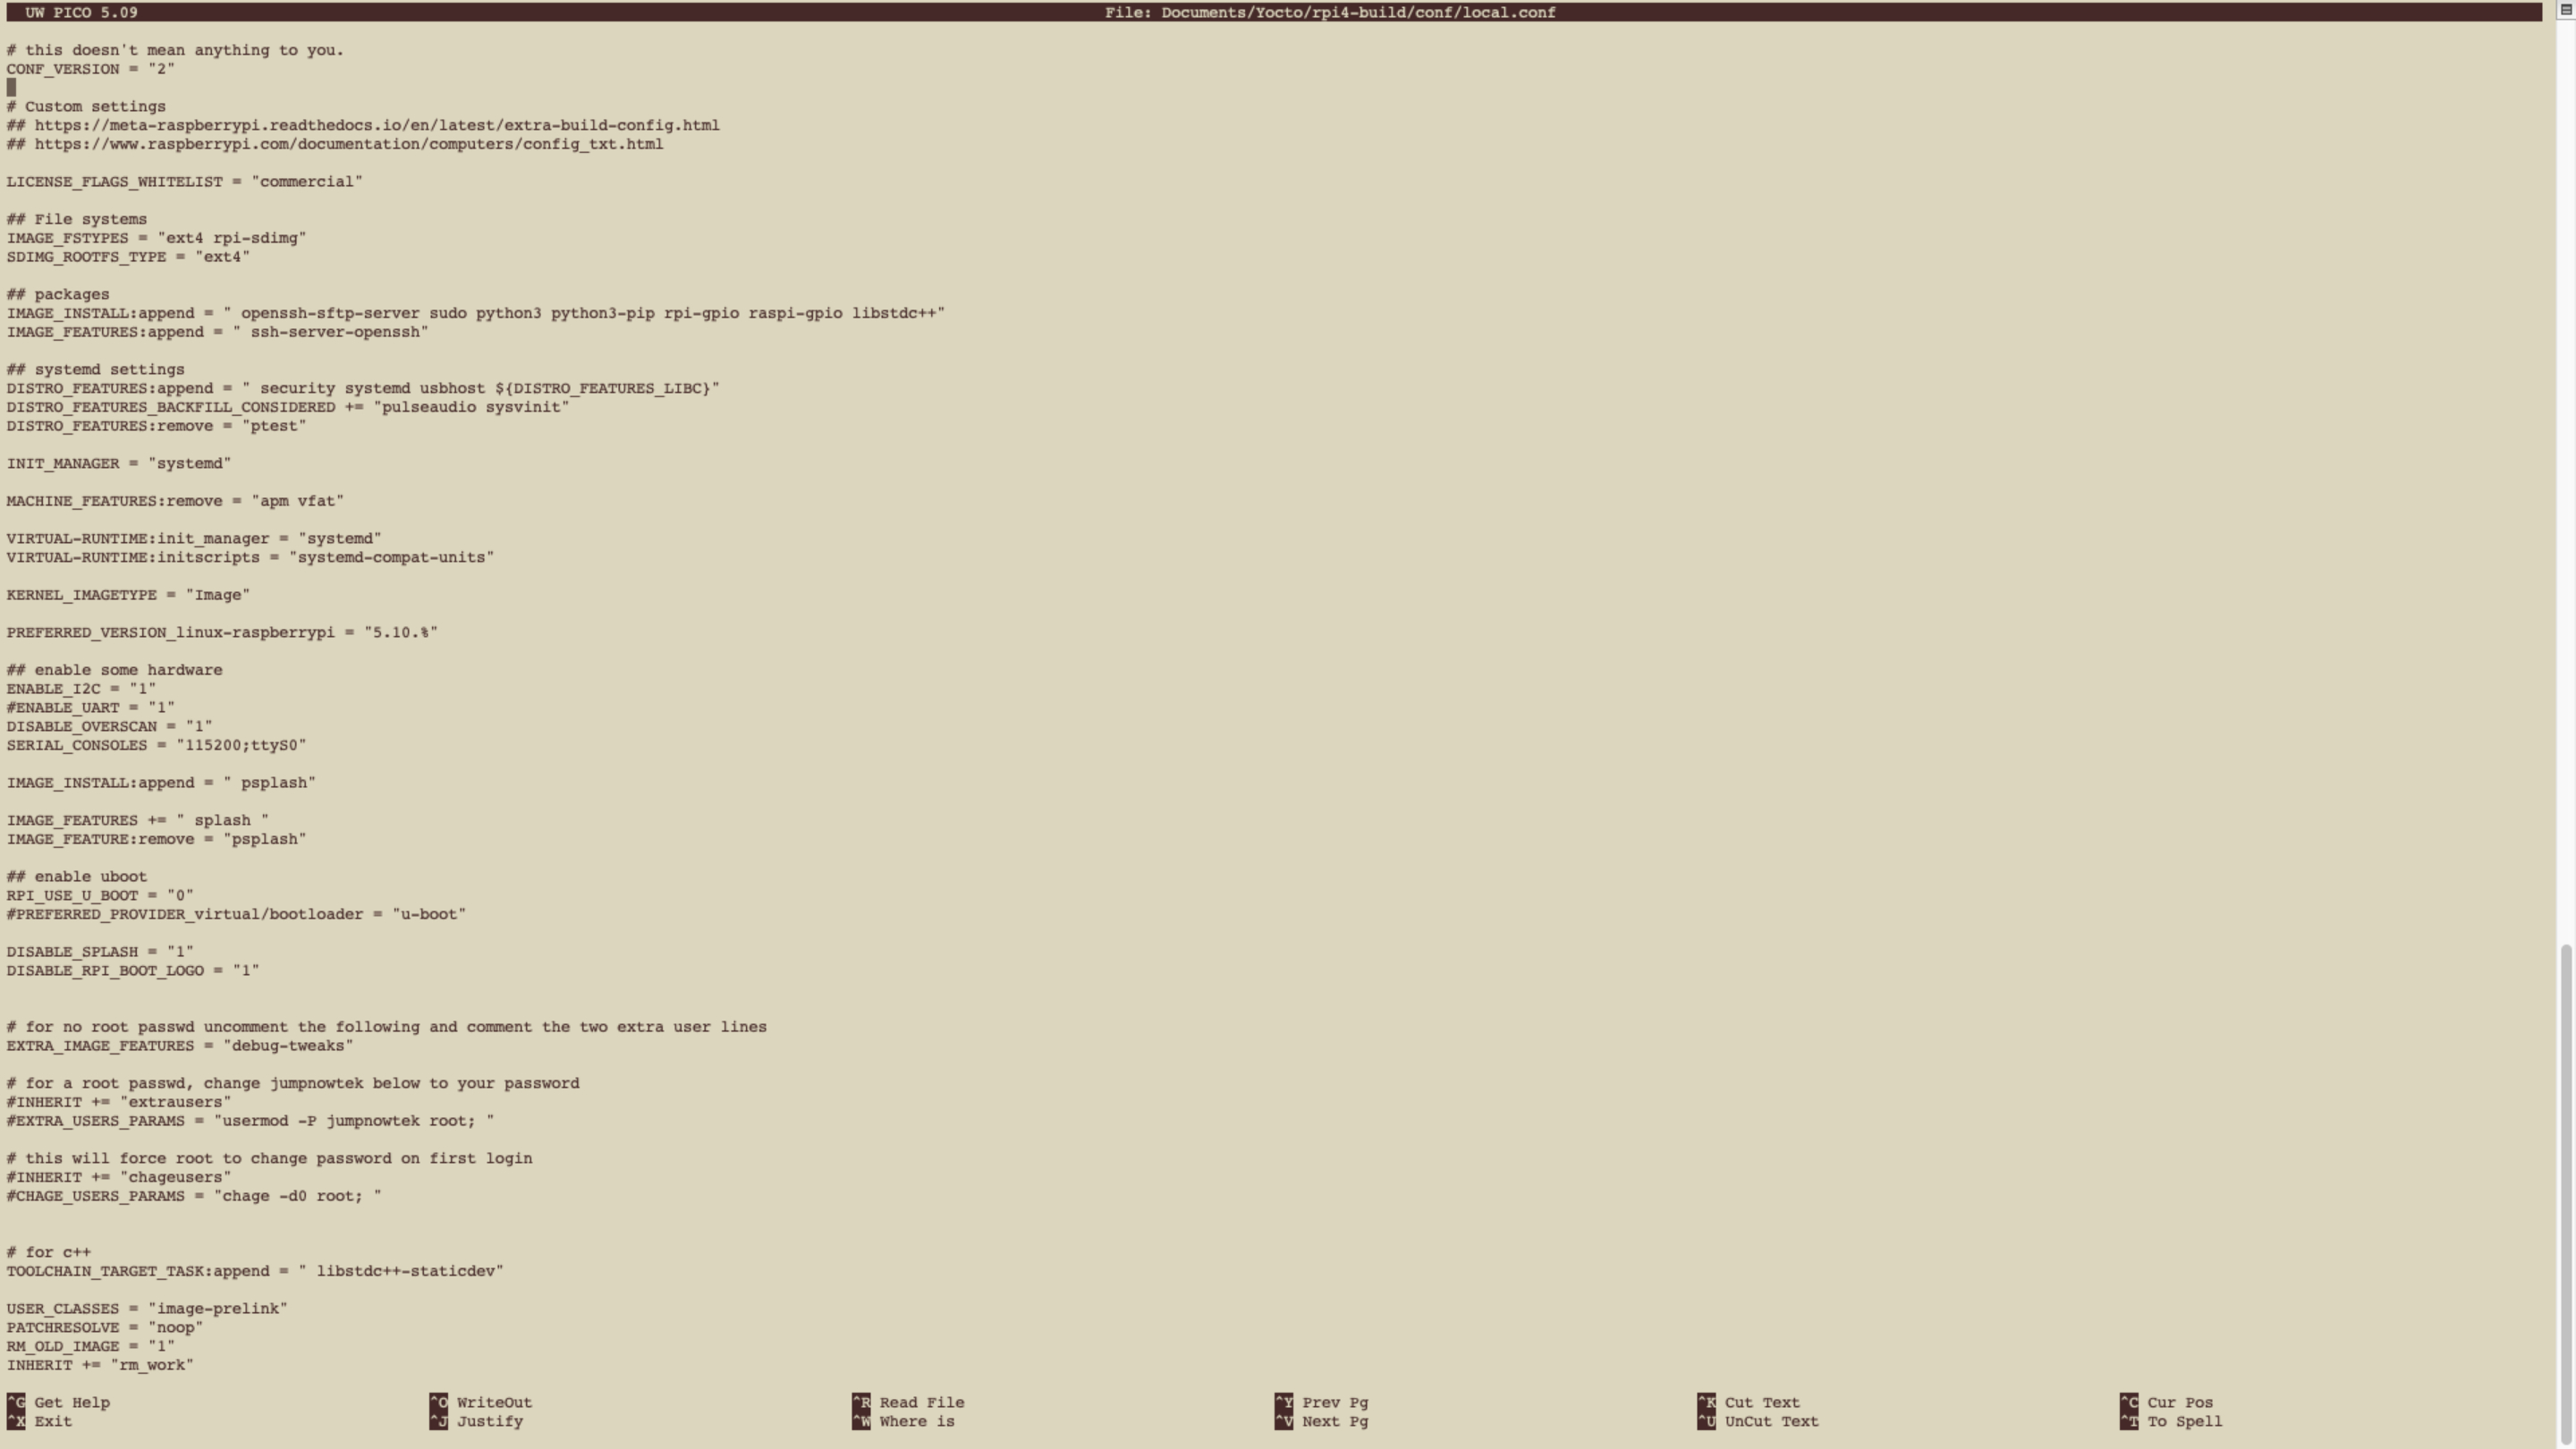
You have to activate systemd in the local.conf file in your Yocto project.
Yocto local.conf
At least you have to adjust your local.conf configuration file of your project. Download bblayers.conf and local.conf from rpi4-build.zip and use them as they are or inspect them and copy the needed sections to your project.
systemd
To activate systemd the following lines should be added to your local.conf file:
## systemd settings
DISTRO_FEATURES:append = " security systemd usbhost ${DISTRO_FEATURES_LIBC}"

INIT_MANAGER = "systemd"

VIRTUAL-RUNTIME:init_manager = "systemd"
VIRTUAL-RUNTIME:initscripts = "systemd-compat-units"
Qt license informations
Please pay attention if you use Qt in a commercial project. The license agreements of Qt are not easy to understand and not easy to be used. You'll find some critical thoughts and insights in the blog Yocto/Qt5: hello-qt part2 - Licensing of Robert Berger.
Suggestions or mistakes
If you have suggestions for improvements or you find some mistakes - don't hesitate to use the contact form at the end of this page and communicate them to us.
Copyright License
Copyright © 2022 Interelectronix e.K.
This Project source code is licensed under the GPL-3.0 license.

