Công thức Ddcutil Yocto
Đối với dự án này, chúng ta cần có thư viện ddcutil để có quyền truy cập vào cài đặt hiển thị HDMI thông qua I2C.
Để đưa thư viện ddcutil vào hệ thống linux tùy chỉnh của bạn, bạn phải tạo một công thức tùy chỉnh cho nó.
ddcutil_git.bb công thức
Trong lớp meta tùy chỉnh của bạn, hãy tạo một thư mục 'recipes-support / ddcutil'. Và trong thư mục này, tạo một tệp 'ddcutil_git.bb'.
SUMMARY = "Tool to modify display settings by ddc (hdmi)"
HOMEPAGE = "http://www.ddcutil.com"
AUTHOR = "Sanford Rockowitz  "
LICENSE = "GPLv2"
LIC_FILES_CHKSUM = "file://COPYING;md5=b234ee4d69f5fce4486a80fdaf4a4263"

BRANCH = "master"

SRCREV = "5080161b456cc6a1fd3e6db3dc537e1dcd1c809b"

PV = "1.2.2+${SRCPV}"

SRC_URI = " \
    git://github.com/rockowitz/ddcutil;branch=${BRANCH};protocol=https; \
    "

######## disable trying to fetch from mirrors
PREMIRRORS = ""
MIRRORS = ""

DEPENDS += "\
    i2c-tools \
    libusb1 \
    libdrm \
    libgudev \
    "

RDEPENDS_${PN} += "\
    i2c-tools \
    i2c-tools-misc \
    libdrm \
    "

S = "${WORKDIR}/git"

EXTRA_OECONF += "\
    --disable-x11 --enable-drm --disable-usb --enable-lib --disable-doxygen \
    "

inherit autotools pkgconfig
Bao gồm ddcutil vào hình ảnh của bạn
Bạn phải bao gồm công thức trong Yocto Linux của mình:
IMAGE_INSTALL:append = " ddcutil"Sau đó, bạn có thể bitbake hình ảnh của bạn và kiểm tra kết quả.</:code22:></:code11:>
Thử nghiệm ddcutil
Đăng nhập vào hệ thống nhúng tùy chỉnh của bạn hoặc kết nối qua SSH.
Bây giờ bạn có thể sử dụng lệnh ddcutil và xem liệu việc triển khai có thành công hay không.
Báo cáo màn hình được phát hiện
Trước hết, bạn có thể phát hiện xem màn hình HDMI có được kết nối và khả dụng thông qua ddcutil hay không.
Sử dụng lệnh sau:
ddcutil detectĐầu ra sẽ trông như thế này:
Display 1
   I2C bus:  /dev/i2c-3
   EDID synopsis:
      Mfg id:               IVM
      Model:                PLT2236
      Product code:         22057
      Serial number:        11402A7100051
      Binary serial number: 51 (0x00000033)
      Manufacture year:     2017,  Week: 1
   VCP version:         2.1
Nhận tất cả cài đặt
Để tải tất cả cài đặt, hãy sử dụng lệnh sau:
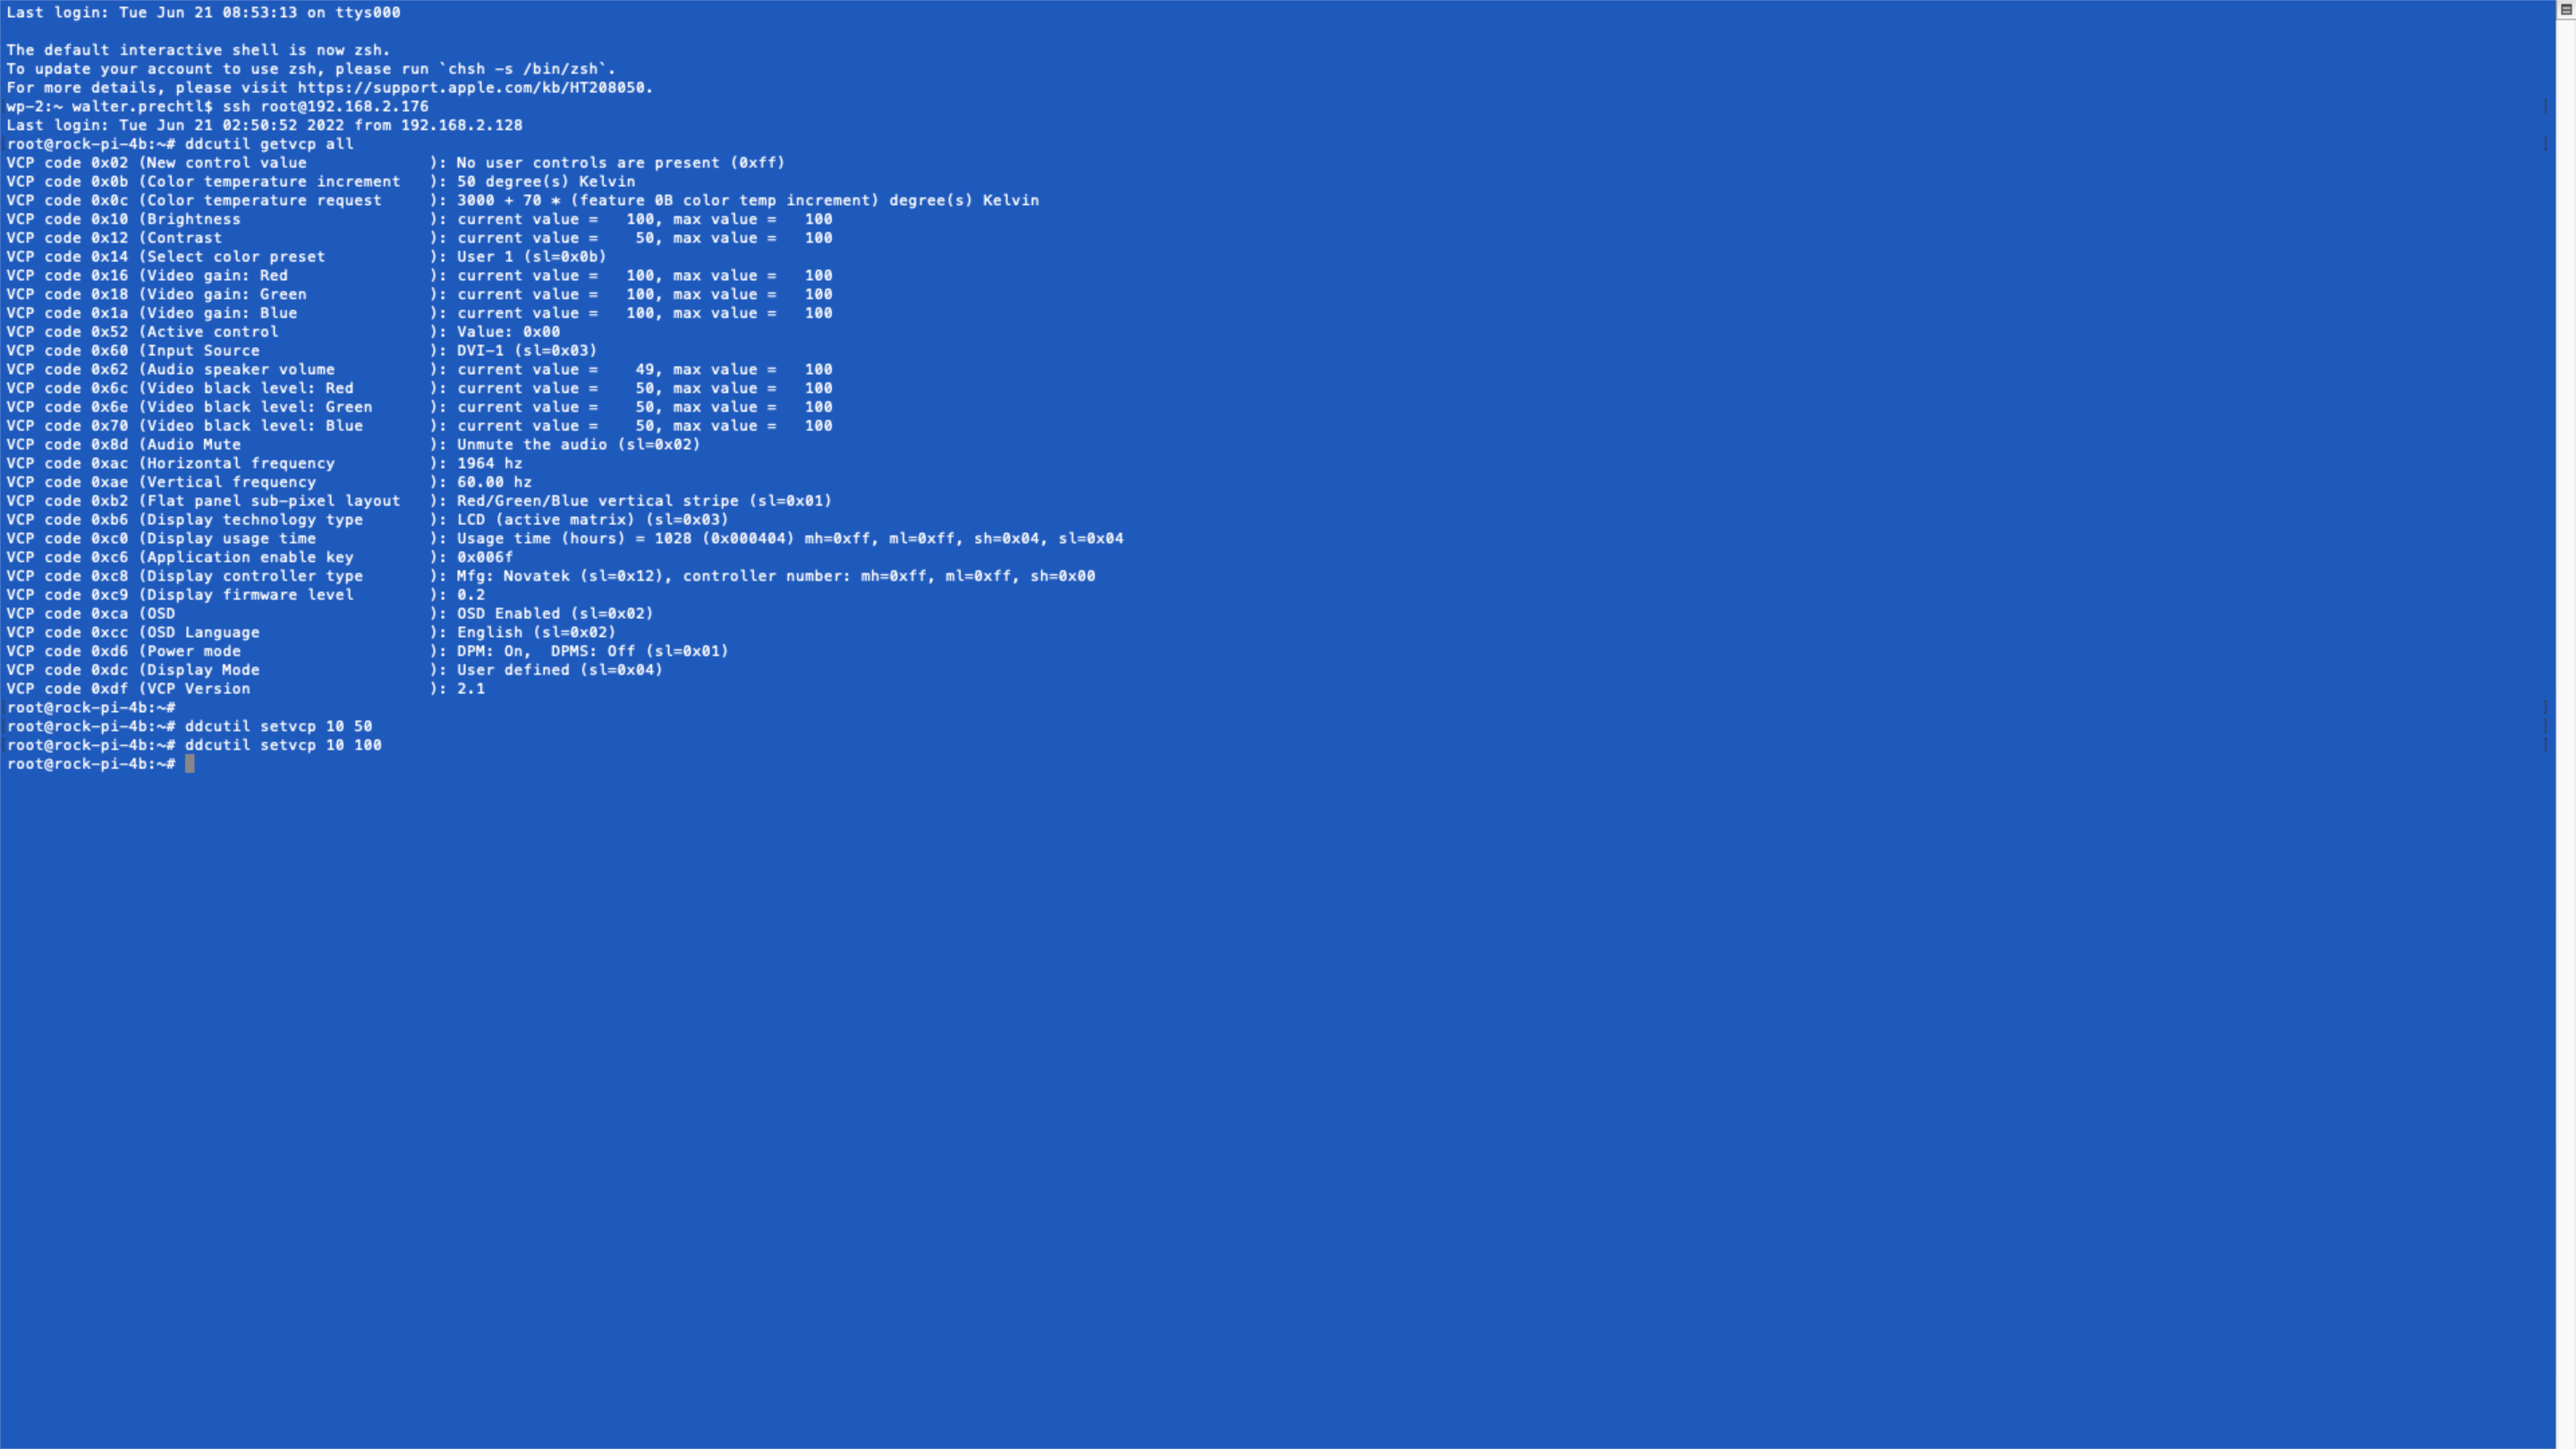
ddcutil getvcp allĐầu ra sẽ trông như thế này:
VCP code 0x02 (New control value             ): No user controls are present (0xff)
VCP code 0x0b (Color temperature increment   ): 50 degree(s) Kelvin
VCP code 0x0c (Color temperature request     ): 3000 + 70 * (feature 0B color temp increment) degree(s) Kelvin
VCP code 0x10 (Brightness                    ): current value =   100, max value =   100
VCP code 0x12 (Contrast                      ): current value =    50, max value =   100
VCP code 0x14 (Select color preset           ): User 1 (sl=0x0b)
VCP code 0x16 (Video gain: Red               ): current value =   100, max value =   100
VCP code 0x18 (Video gain: Green             ): current value =   100, max value =   100
VCP code 0x1a (Video gain: Blue              ): current value =   100, max value =   100
VCP code 0x52 (Active control                ): Value: 0x00
VCP code 0x60 (Input Source                  ): DVI-1 (sl=0x03)
VCP code 0x62 (Audio speaker volume          ): current value =    49, max value =   100
VCP code 0x6c (Video black level: Red        ): current value =    50, max value =   100
VCP code 0x6e (Video black level: Green      ): current value =    50, max value =   100
VCP code 0x70 (Video black level: Blue       ): current value =    50, max value =   100
VCP code 0x8d (Audio Mute                    ): Unmute the audio (sl=0x02)
VCP code 0xac (Horizontal frequency          ): 1964 hz
VCP code 0xae (Vertical frequency            ): 60.00 hz
VCP code 0xb2 (Flat panel sub-pixel layout   ): Red/Green/Blue vertical stripe (sl=0x01)
VCP code 0xb6 (Display technology type       ): LCD (active matrix) (sl=0x03)
VCP code 0xc0 (Display usage time            ): Usage time (hours) = 1030 (0x000406) mh=0xff, ml=0xff, sh=0x04, sl=0x06
VCP code 0xc6 (Application enable key        ): 0x006f
VCP code 0xc8 (Display controller type       ): Mfg: Novatek (sl=0x12), controller number: mh=0xff, ml=0xff, sh=0x00
VCP code 0xc9 (Display firmware level        ): 0.2
VCP code 0xca (OSD                           ): OSD Enabled (sl=0x02)
VCP code 0xcc (OSD Language                  ): English (sl=0x02)
VCP code 0xd6 (Power mode                    ): DPM: On,  DPMS: Off (sl=0x01)
VCP code 0xdc (Display Mode                  ): User defined (sl=0x04)
VCP code 0xdf (VCP Version                   ): 2.1
Đặt độ sáng
Để đặt độ sáng của màn hình thành 50%, hãy sử dụng lệnh sau:
ddcutil setvcp 10 50Giấy phép bản quyền
**Bản quyền © 2022 Interelectronix ví dụ: **
Mã nguồn Project này được cấp phép theo giấy phép GPL-3.0.

